Showing posts with label CUTFILE. Show all posts

2/24/2017

A wreath layout with the Flower Delivery cut file

Hello, It's Eunyoung. Today I'll show you a wreath layout. I used the Flower Delivery cut file .


I cut the several images from the Flower Delivery cut file with a white cardstock. At first, I tried painting the cutting images with watercolors. But I think the cutting image(shape) is so beautiful itself, so I decided to use it without any painting.
 

I chose a pastel colored patterned paper as a background. After arranging the cutting images for making a wreath, I added them using pop-dots. I did machine stitching on the wreath with a white thread.  


I added a title and finish to embellished with puffy stickers.
 
 
I hope you like my page and thank you for stopping by.


2/16/2017

A layout with The XOXO cut file

 Today I'll share a layout the XOXO cut file and a book paper of The little prince. I layered the pieces of cutting images, patterned papers and a book paper.  


After I cut the images of The XOXO cut file on a white cardstock, I painted them with watercolors.  
 
 
I layered patterned papers and a book paper using doubleside tape. I used a book paper from 'The little prince'. I like both of all the story and the drawing of it.
 
 
I like the spread of watercolors and it is because that I often use watercolors on a white cardstock.  I embellished a with pink & whit colored thread and some dried flowers.
 

 I hope you'll enjoy it and it'll inspire you!! Thank you for stopping by.


2/01/2017

A layout with the Bless Your Heart cut file set

Today I'll share a cute layout with a the Bless Your Heart cut file set.


The Bless Your Heart cut file set includes adorable 4 heart designs. I chose small heart shaped heart cut file. It is because I planed to use all of heart shapes (small and big one).


How to :
1. Cut the heart cut file and do machine stitching
2. Add the heart cut file on cardstock using pop-dots
3. Do machine stitching around heart cut file
4. Arrange a photo, banner ephemera and a title


5. Add a title with puffy alphabet
6. Add some heart pieces in heart-shape space and background using pop-dots. 
7. Embellish with ephemera and puffy stickers
8. Finish to stamp a date


 I hope you'll enjoy it and thank you for stopping by.


1/18/2017

A layout with the Flower Delivery cut file

Hello, crafty friends. It's Eunyoung. Today I'll share a layout with a watercolored Flower Delivery cut file. 


1. Arrange the cutfiles as I want image using Silhouette Cameo.
2. Cut the image with a white cardstock.
3. Do machine stitching on the cut file image.
4. Paint the cut file image with watercolor.
5. Arrange the cut file image, a photo and a title on a white cardstock.
 
 
6. Embellish with chipboard stickers.
7. Add message stickers under the photo.
8. Splatter a blackcolor mist.
9. Layer the patterned paper on the backside a white cardstock. 


I hope you'll enjoy this and thank you!!


11/30/2016

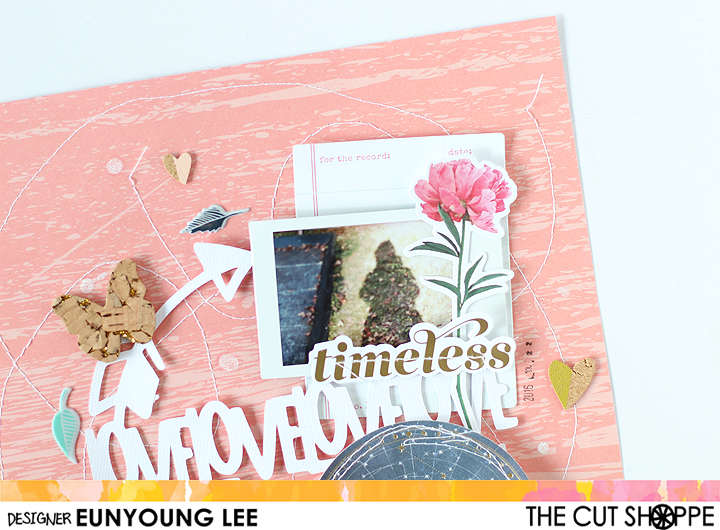
Lovelovelove

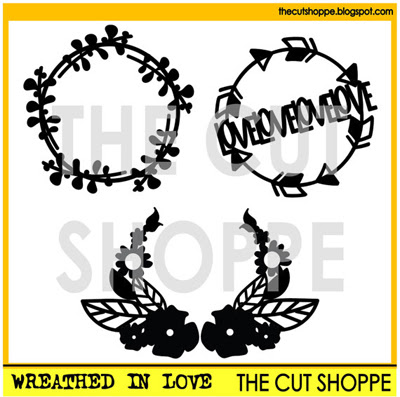
Today I'll a layout with a beautiful wreath cutfile. I used a The Wreathed in Love cut file set.
 
 
https://www.etsy.com/listing/475796308/the-wreated-in-love-cut-file-set?ref=shop_home_active_18
 
Wreathed in Love cut file set includes three beautiful wreath die-cuts.
 
 
1. Cut a wreath cutfile by silhouette cameo.
2. Do machine stitching on background with a white thread.
3. Arrange wreath die-cut, a photo, other die-cuts.
4. Do machine stitching on die-cuts.
 
 
5. After adding a wreath die-cut, add a photo & other die-cuts using pop-dots.
6. Embellish with puffy stickers & cork stickers.
7. Stamp a date.
8. Finish to splatter a white mist on background. 
 
 
I hope you'll enjoy it and Thank you for stopping by.


10/29/2016

A layout with a Halloween themed cut file

Hello,crafty friends~ Halloween is approaching!! I don't enjoy Halloween but I can't resist the cute images from Halloween themed cut file. So Today I'll share a layout using Halloween images cutfile.


I used Wicked Good cut files  for this layout. It  includes 9 Halloween themed images.


1. Create own image using a spiderwep cutfile.
2. Do machine stitching the spiderwep image & white cardstock(a background).
3. Add patterned papers on the backside of spiderwep image with doble side tape.
4. Add spiderwep image & photo on a white cardstock.
5. Embellish with cork arrows stickers, wood veneer, diecut and so on.
6.Add patterned paper on the backside of white cardstock.
7. Stamp a date and finish to splatter a black color mist.

Thank you for stopping by.

8/22/2016

Layout - Most Favorite

Today I'll show you a heartful layout! :) There are somethings that I can't resist ; pink & white colors, floral patterns, grid design and heart shape!!! I think they will never be boring for my crafty time. And I found so lovely heart shape from The Oodles of Doodles cut file set.


This set includes 12 doodled images. I selected a heart shape from cutfiles and edited the original cutfile to be a heart group.


I used 6x6 paper pad for matching backside of heart cutfile. I usually 6x6 paper pad for small shape cutfile and 12x12 patterned paper for a big or a full cutfile. Because it's a the size of patterns on papers.
 
 
After adding patterned paper pieces on backside of hearts, I did machine stitching on each heart shape. I used a multi-pink colored thread. I added the heart cutfile in the center of the layout with pop-dots. I embellished with puffy stickers, chipboard stickers and flower accents. I finished to splatter black color mist on background and stamp a date.


I hope you like this and Thank you for stopping by.


7/19/2016

Layout - My Fave.

Hello, scrappy friends~ Today I'm sharing a layout using a new cut file - 'And Then'. You can see four pretty 'And Then' cut files in The Cut Shoppe Etsy Store.


Step 1. Pick a cutfile and background. 
Because I like this 'hello' font, I used 'hello' And Then cut file. It's so pretty. I usually start my page with white cardstock. But today I choose a pink colored striped pattern paper as a basis.
 
 
Step 2. Do machine stitching on cutfile and paper pieces.
I did randomly machine stitching on 'hello' with pink thread. And I did machine stitching the around of a pink colored striped pattern paper, heart shapes, butterflies, strips and my photo with white thread for a fun texture. 
 
 
Step 3. Arrange and embellish
After machine stitching, I arrange every pieces on 12x12 inch white cardstock. And then I added them with double side tape & pop-dots. I think that the shade of layering (the 3D effect) is very important, so I often use three different-high adhesive on a page. I embellished with a button, puffy stickers & chipboard shape.
 

Step 4. Title and splatter
I added the title with foam words sticker and splatter black color-shine on background. My last touch is stamping a date.
 
What do you think  about my layout with a new cut file? I hope you'll enjoy it!!
Happy crafty time and Thank you!!